

Welcome to the Black & Tan blog!Thanks for checking out our site! We have just begun construction on a Mckenzie River Style drift boat that we have affectionately named the Black & Tan, which will be her ultimate color scheme. It is no coincidence that she shares her name with one of the greatest adult beverages of all time. We have chosen this proven design because we are confident it will serve us quite well in the waters we fish most, which include the The Housatonic and Farmington Rivers of Northern CT, The inshore waters Long Island Sound, and most recently the Great Lakes Tribs and the wonderful St. Lawrence River waterway, a place that Mack calls home. We obtained the boat plans online, similar plans are available through Rivers Touch. She will be 14 feet long with a relatively wide beam and bow rocker for safely navigating the rapids but she will also have a high and wide, slightly rockered, transom which can accomodate a up to a 10hp motor should we decide to venture out into the brackish bays and estuaries of Long Island Sound. Unlike most traditional drift boats, this boat can be used both as a flat bottom motor skiff and a rowing dory. Our project has just begun, and we are full of enthusiasm. The design and finish concepts change every day, who knows what the final product will look like, but thats half the fun! We hope you enjoy our site, we will try to update it weekly if possible. Thanks for stopping by!
For more info on the Rapid Robert Mckenzie River Skiff we are building, Click Here or better yet, Here
Wednesday, September 4, 2013
.JPG)
.JPG)
.JPG)
Sunday, September 1, 2013
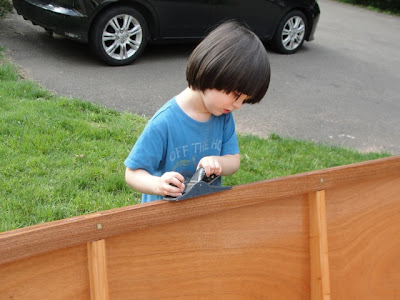
Layla
This week brought the arrival of my baby daughter, Layla, this will of course lead to some delays in the finishing of the boat, but I sure can't wait to take her out on the water!
.JPG)
.JPG)
August Update: Rowing Seat, Bench Rails, Oarlock mounts, Paint, and Varnish
A lot of progress has been made in August, mostly in paint in Varnish, but a few hardware additions as well, and the B&T is steadily approaching her initial float! After Priming the hull we used a 2 part industrial polyurethane as a basecoat, then topped it off with a coat of Petit Brightsides. We will probably add another coat before she is splashed. The First of 3 interior coats of Spar urehthane varnish has been applied and she is looking great! when finished the interior will have 3 coats of epoxy topped with 3 coats of varnish. You will also notice the custom made rope rowing seat and aluminum rails for the passenger bench seat have been installed. The bench seat is being made from a 1.25 inch Mahogany board Mack borrowed from his family's home on the St. Lawrence River, and interestingly enough it has a legacy of its own, as it once served as the seat in a wooden boat Mack's father restored years ago. The other notable installation is the oarlock mounts, which are fashioned out of Sapelle and sandwiched into the gunnel. Another coat of paint, few more coats of varnish, some hardware for the motor well, and some floorboards and she's ready to go. Can't wait!
.JPG)
.JPG)

.jpeg)
.JPG) |
| Oarlock mounts |
.JPG) |
| rowing seat |
.JPG)
.JPG)

.jpeg)
Friday, July 26, 2013
Sunday, July 21, 2013
Primer Coat
The heat has finally backed off and we took advantage of this sunny day. Got two coats of military grade epoxy based primer on and she's lookin like a real boat! Thanks to Mack's friend George for supplying the goods!
.JPG)
.JPG)
.JPG)
.JPG)
.JPG)
.JPG)
.JPG)
.JPG)
 | |
| Photo courtesy of M. Bross Hodges |
Thursday, June 27, 2013
rowing seat!
Mack did some nice work in designing a rope rowing seat this week. below are some pics. there is a similar design here. This design will be altered a bit to include a machined aluminum adjustment system which we will patent and share with those interested at a later date (just kidding) We don't have pics yet but they will be up soon. Cant wait to get some paint on this beast and get her in the water! Mack also machined some nice brass scuppers for the splash well, nice touch!


Wednesday, June 12, 2013
Who's the Bross
Bross is turning out to be a great helper. Today we sanded, then we sanded, after that we sanded. then we got to woodwork with the Sapelle, some nice crossbeams for the bow and stern.
.JPG)
.JPG)
.JPG)
.JPG)
.JPG)
.JPG)
.JPG)
.JPG)
Tuesday, June 11, 2013
Transom detail.....
Just a few photos this week, rain has been slowing us down. We've added another coat of epoxy inside and out, and begun sanding and prep for the paint. The transom has been detailed as well with some nice sapelle, which was cut, biscuited and epoxied to the doug fir transom.


Saturday, May 25, 2013
nuthin but net
A fine handcrafted net made by TMack Hodges, 2nd edition, first with trout inlay! this logo will eventually round out our dory. This was Mack's wedding gift to me, a handcrafted trout net fashioned from a single maple branch, cant wait to put some truchas in it!


More Brain cells lost.....
Who's counting anyway? Fairing, wasn't so fair to us. Anyhow, as you can see, Mack has installed the gunnels and secured them with epoxy and some nice brass hardware! The boat was shipped to the shop where Mack works, couldn't have asked for a better place to work on our boat, especially in this terrible but much needed rainstorm. Thanks to the guys at ESI once again, for lending us the space and the truck. Today we did some light touches to the interior, the we faired the exterior hull using west system and 407/410 filler. The hull was wetted out with epoxy, then faired with the compound. Tomorrow we will sand it level and add a final coat of epoxy before painting, which is when things should really get interesting! here are some pics and vids from today......


Sunday, May 5, 2013
slowly but surely
Today we worked on the trailer and gunnels a bit, nice to have her out in the sun again. Mack has also been doing some fine artwork on what will be our future inlay/brand/christmas tree ornaments/t-shirts lunchbox mugs etc.......


Monday, April 29, 2013
2nd coat and exterior gunnel
quick update, progress is slowing as we wait for good weather to finish our 2nd and 3rd coats of epoxy. at this point, the interior has had its second coat, and the exterior gunnels were cut, planed and added from leftover Sapelle stock from the interior chines.


Wednesday, April 17, 2013
Sealin her up!
On Sunday we tackled the transom and interior. First Mack trimmed all the rib stems and then notched out the motor well. While he sanded out the interior I glassed the transom with 6oz glass fabric and we cut it to fit. Then we coated the entire interior with 105/205 epoxy using rollers and trimming and finishing with brushes. While we waited for it to cure we took Bross to the river to catch some trout....

.JPG)

.JPG)


.JPG)

.JPG)


Subscribe to:
Comments (Atom)